advertisement
Robotic Arm: Assembly & Software Installation
When you build a robot, there are basically two approaches: you can start from scratch, get all the necessary hardware (the chassis, sensor, actuators, and microcontroller or single-board computers), and program the software. Or purchase a complete kit that includes all the parts and a software stack. During the first half of 2021 I followed the first approach and built two mobile robots, RADU MK1 and RADU MK2. The MK2 version also included ROS as a middleware layer, supporting the goal of semi-autonomous navigation by detecting its environment.
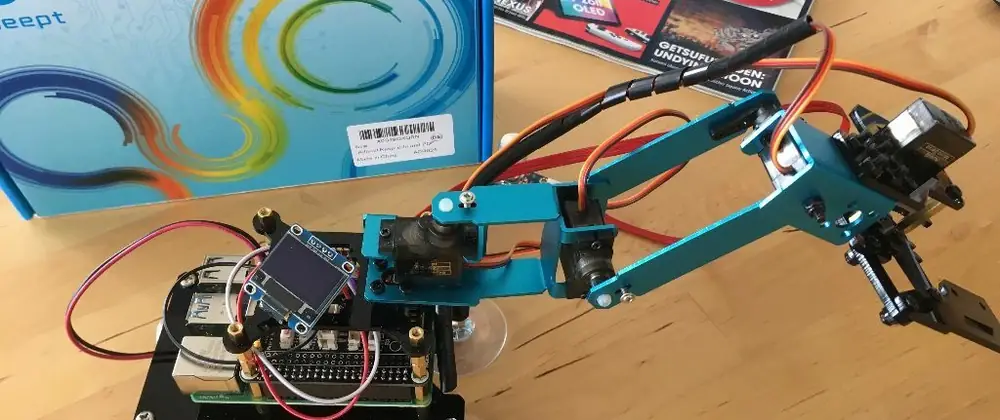
My goal with RADU is to give you the ability to grab objects and move them to another location. To boost my knowledge and skills on robotic arms, I decided to switch to the second approach and purchased a complete robotic arm kit. This kit is a 4 degrees of freedom arm, mounted on a Raspberry Pi with a dedicated PCA-9685 motor shield. In this article, I explain the lessons learned when assembling this kit and how to make it functional.
This article originally appeared on my blog admantium.com.
Assembly
Operating system installation
I like to use the most up-to-date software when I work. Naturally, I downloaded the latest version of the Raspian OS available at the time of writing: 2021-05-07-raspios-buster-armhf
. But with this version I couldn't run any of the examples. Since the official manual for the robot arm kit was written in 05/2020, I downloaded an older version of Raspbian OS from this mirror: 2020-02-05-raspbian-buster
. And with this, the examples worked perfectly.
Raspian OS Customization
Selecting the correct version of the operating system is the first step. Before booting, do the following:
- Enable SSH: add a file named
ssh
at/start
folder - WLAN enabled: add one
wpa.supplicant
al/boot file
folder with this content:
ctrl_interface=DIR=/var/run/wpa_supplicant GROUP=netdev
country=
config_update=1
network={
ssid=""
psk=""
}
Start Raspberry Pi and then connect with ssh [email protected]
. Continue with these optimizations:
- Expand SD card storage: Run
sudo raspi-config
, then go to 7 Advanced Options
andA1 Expand file system
, confirm with Yes
- Enable VNC: Run
sudo raspi-config
, then go to 5 Interface Options
and P3 VNC
, confirm with Yes
- Allow access to I2C, SPI and GPIO running
sudo usermod -a -G i2c,spi,gpio pi
- Fix Regional Settings: Run
sudo dpkg-reconfigure local
and check all relevant locales. Then run sudo nano /etc/environment
and enter these lines:
LC_ALL=es_US.UTF-8
LANG=en_US.UTF-8
Reboot and get ready.
Add ARM source code
The official repository contains the configuration, example code and programs to remotely control the arm. We will explore them step by step, but the most important thing comes first.
With configuration.py
, all the necessary libraries and a series of system configurations, such as enabling I2C, are performed. It also installs an autostart script that may prevent your system from booting completely if there is no library installed. Therefore, I recommend removing the following lines at the end of the script.
# SOURCE: https://github.com/adeept/adeept_rasparms/blob/master/setup.py
os.system('sudo chmod 777 //home/pi/startup.sh')
replace_num('/etc/rc.local','fi','fi\n//home/pi/startup.sh home')
Try: #fix conflict with Raspberry Pi integrated audio
os.system('sudo touch /etc/modprobe.d/snd-blacklist.conf')
with open("/etc/modprobe.d/snd-blacklist.conf",'w') as file_to_write:
file_to_write.write("blacklist snd_bcm2835")
except:
pass
print('The program on Raspberry Pi has been installed, disconnected and restarted. \nNow you can turn off Raspberry Pi to install the camera and controller board (Robot HAT). \nAfter turning on again, Raspberry Pi will automatically run the program to configure the servo port signal to turn on the servos.
advertisement
Related Articles


advertisement